what are the differences between the two can mean for your development proces?
This article shows the differences between android studio and eclipse
Differences in working with Android Studio and Eclipse
First thing is that there is no need of workspaces and sub projects.in eclipse we are familiar with the multiple components projects and libraries. which are compiled into .jar files which are included in the final resulting application.
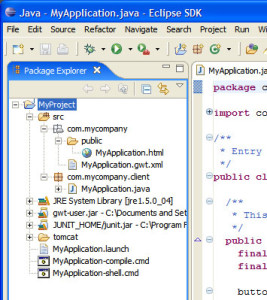
workspace and sub-projects by “Modules” and “Library Modules”
The new concept in android studio is to replace the workspace and sub-projects by “Modules” and “Library Modules”
Modules
module in Android Studio is like a project in Eclipse
project in Android Studio is like a workspace in Eclipse
Each Module needs to have it’s own Grade Build File(generally automatically generated for you when you create a new one, otherwise you can generate them (if your exporting projects from eclipse). These Gradle files contain important details such as supported Android version ranges, dependencies and other meta-data about your Android project.
Just like in Eclipse, some Modules may be “Library Modules” which are conceptually the same as “Library projects.”
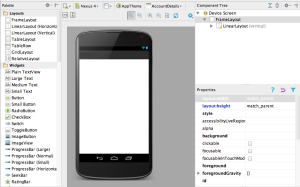
Interface Designer Perspective
Android Studio features a new and improved interface design perspective where you can view the interface you are working on and its related components.Eclipse also has a similar design perspective
Including Jar Dependencies
Like Eclipse, you will often need to link to JAR files created by 3rd parties. However, you will now need to get used to adding these .jar dependencies to your Gradle build file. Just like Eclipse, you will keep these .jar files in a “libs” folder at the root of your module (e.g. project) directory.
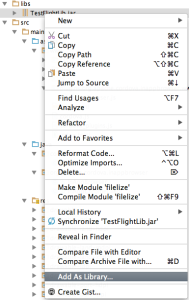
“Right-Click” .jar files in your “libs” directory and select “Add As Library” and your selected JAR files will automatically be added as Gradle dependencies in the relevant build.gradle file for your Module. Make sure to always click “Sync Gradle” to ensure the project has been properly notified of the new dependency on these modules.
Adding Module Dependencies
In Eclipse, one Module may depend on another Module. Follow these instruction to establish a dependency between two modules and Android Studio will automatically generate the necessary Gradle entries you will need.
Manifest Destiny
One major change you will need to get used to with Android Studio is that several common items and settings which once lived in the Android Manifest now are either automatically added (as in the case of the “debuggable=true”flag indicating an android application may be debugged) or have been moved to build.gradle such as version codes and API min / max specifications. Feature and permission requirements, however, must still be declared in the Manifest as before (e.g. “permission: camera” and so on)
Gradle Basics
The addition of Gradle is going to be your largest hurdle during your transition over to Android Studio. Here are the basics of what you need to know:
- Your Android Studio project will have a settings.gradle for the whole project
- The settings.gradle file includes references to all modules which are included in the project and is generally updated automatically when you import or create a new module
- Each Android Studio module will have its own build.gradle file
- If one module depends upon another module, you will need to add that dependency in the build.gradle under the dependencies section
- If your Module requries a jar file, it must be listed in that Module’s build.gradle file
- You may add remote dependencies to your project by listing them in a module’s build.gradle file


Pingback: Learn Android with 20+ Best Website Tutorials